Fan out Webhook Events to Multiple Endpoints
One common scenario in publishing webhook events is enabling users to provide multiple endpoints to receive events. One easy example is publishing an event that the user needs to process at more than one location. This location could be a no-code platform like zapier, a newly minted microservice or serverless function, or a good old slack notification. In this article, I’d like to explain how you can achieve this using Convoy.
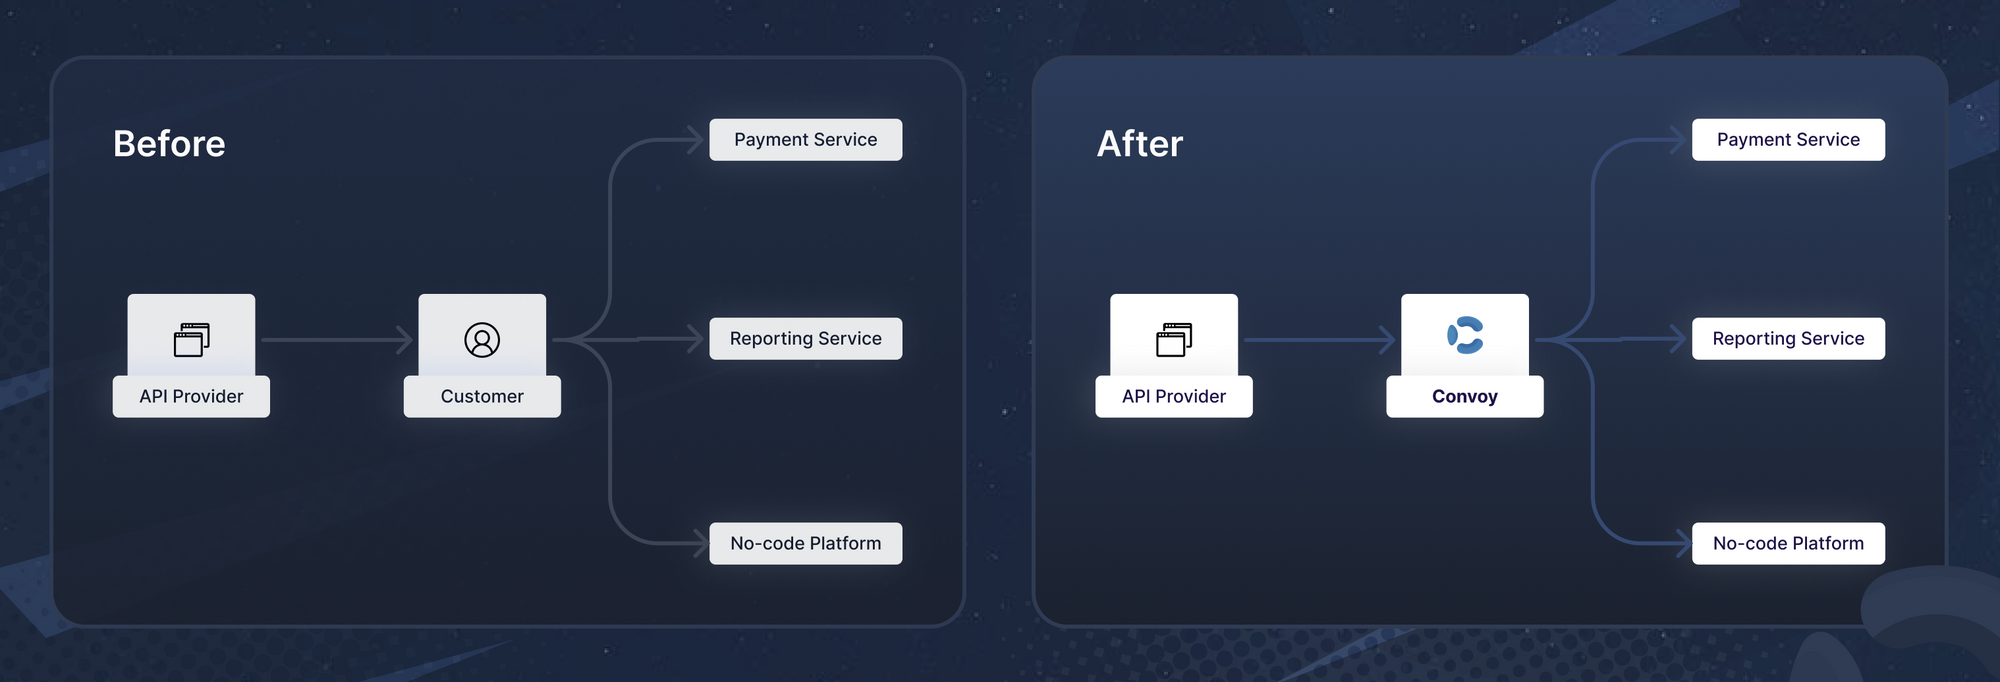
Without Convoy, your users have to build in the fan-out mechanism themselves, which is more stressful.
To follow along you would need the following
- A Convoy Cloud account.
- An Outgoing Project ID & API Key.
Create Two Endpoints
First, we have to create two endpoints with the same owner_id; you can think of owner_idas an id used to group multiple endpoints under one entity e.g. merchant.
For the first endpoint:
$ curl \
    --request POST \
    --url "https://dashboard.getconvoy.io/api/v1/projects/{projectID}/endpoints" \
    -H "Content-Type: application/json" \
    --data '
      {
        "description": "test-endpoint-1",
        "owner_id": "<your-owner-id>",
        "events": [ "*" ],
        "secret": "12345",
        "url": "https://<your-endpoint-url>"
      }'
{
	"status": true,
	"message": "Endpoint created successfully",
	"data": {
		"uid": "7556a922-7d10-47b1-b254-4dde679d9fbd",
		"project_id": "acc1bf6d-c309-4a99-b9a7-a9410fa5f6c4",
		"target_url": "https://<your-endpoint-url>",
		"owner_id": "<your-owner-id>",
		"title": "test_endpoint_1",
		"secrets": [
			{
				"uid": "72e9d70f-b57e-4f49-b098-01e8ea9795e7",
				"value": "1234",
				"created_at": "2022-12-15T13:38:01.638Z",
				"updated_at": "2022-12-15T13:38:01.638Z"
			}
		],
		"advanced_signatures": false,
		"description": "xx",
		"http_timeout": "",
		"rate_limit": 5000,
		"rate_limit_duration": "1m0s",
		"authentication": null,
		"created_at": "2022-12-15T13:38:01.638Z",
		"updated_at": "2022-12-15T13:38:01.638Z"
	}
}
For the second endpoint:
$ curl \
    --request POST \
    --url "https://dashboard.getconvoy.io/api/v1/projects/{projectID}/endpoints" \
    -H "Content-Type: application/json" \
    --data '
      {
        "description": "test-endpoint-2",
        "owner_id": "<your-owner-id>",
        "events": [ "*" ],
        "secret": "12345",
        "url": "https://<your-endpoint-url>"
      }'
{
	"status": true,
	"message": "Endpoint created successfully",
	"data": {
		"uid": "7556a922-7d10-47b1-b254-4dde679d9fbd",
		"project_id": "acc1bf6d-c309-4a99-b9a7-a9410fa5f6c4",
		"owner_id": "<your-owner-id>",
		"target_url": "https://<your-endpoint-url>",
		"title": "test_endpoint_2",
		"secrets": [
			{
				"uid": "89e9d70f-b57e-4f49-b098-01e8ea9795e7",
				"value": "1234",
				"created_at": "2022-12-15T13:38:01.638Z",
				"updated_at": "2022-12-15T13:38:01.638Z"
			}
		],
		"advanced_signatures": false,
		"description": "xx",
		"http_timeout": "",
		"rate_limit": 5000,
		"rate_limit_duration": "1m0s",
		"authentication": null,
		"created_at": "2022-12-15T13:38:01.638Z",
		"updated_at": "2022-12-15T13:38:01.638Z"
	}
}
Create One Subscription for Each Endpoint
Now we have to create subscriptions for each endpoint.
$ curl \
    --request POST \
    --url "https://dashboard.getconvoy.io/api/v1/projects/{projectID}/subscriptions" \
    -H "Content-Type: application/json" \
    --data '
      {
        "endpoint_id": "<your-endpoint-id>",
        "name": "test-sub-1"
      }'
{
	"status": true,
	"message": "Subscription created successfully",
	"data": {
  	  "uid": "eb1e6167-d076-4366-b458-2ca7e358986e",
	  "endpoint_id": "<your-endpoint-id>",
		"name": "test-sub-1",
		"type": "api",
		"status": "active",
		"filter_config": {
			"event_types": [
				"*"
			],
			"filter": {}
		},
		"created_at": "2022-12-15T13:56:22.256Z",
		"updated_at": "2022-12-15T13:56:22.256Z"
	}
}
Repeat the same for the second subscription.
Publish Event
Now let us publish an event with the type to our endpoints. We’ll specify the owner_id we used for both endpoints, this allows convoy to dispatch the event to both endpoints.
$ curl \
    --request POST \
    --url "https://dashboard.getconvoy.io/api/v1/projects/{projectID}/events" \
    --data @event.json \
    -H "Content-Type: application/json" \
    --data '
      {
        "owner_id": "<your-owner-id>",
        "data": {
		"blog": "https://getconvoy.io/blog"
	},
        "event_type": "ping"
      }'
{
	"status": true,
	"message": "Endpoint event created successfully",
	"data": {
		"uid": "cdff6a37-8a41-412b-aa55-748cdefd8017",
		"event_type": "ping",
		"project_id": "acc1bf6d-c309-4a99-b9a7-a9410fa5f6c4",
		"endpoints": [
			"b5e4d42e-3ad6-4546-9f88-4f36b3f82941",
			"7556a922-7d10-47b1-b254-4dde679d9fbd"
		],
		"data": {
			"blog": "https://getconvoy.io/blog"
		},
		"created_at": "2022-12-15T13:39:45.276Z",
		"updated_at": "2022-12-15T13:39:45.276Z"
	}
}
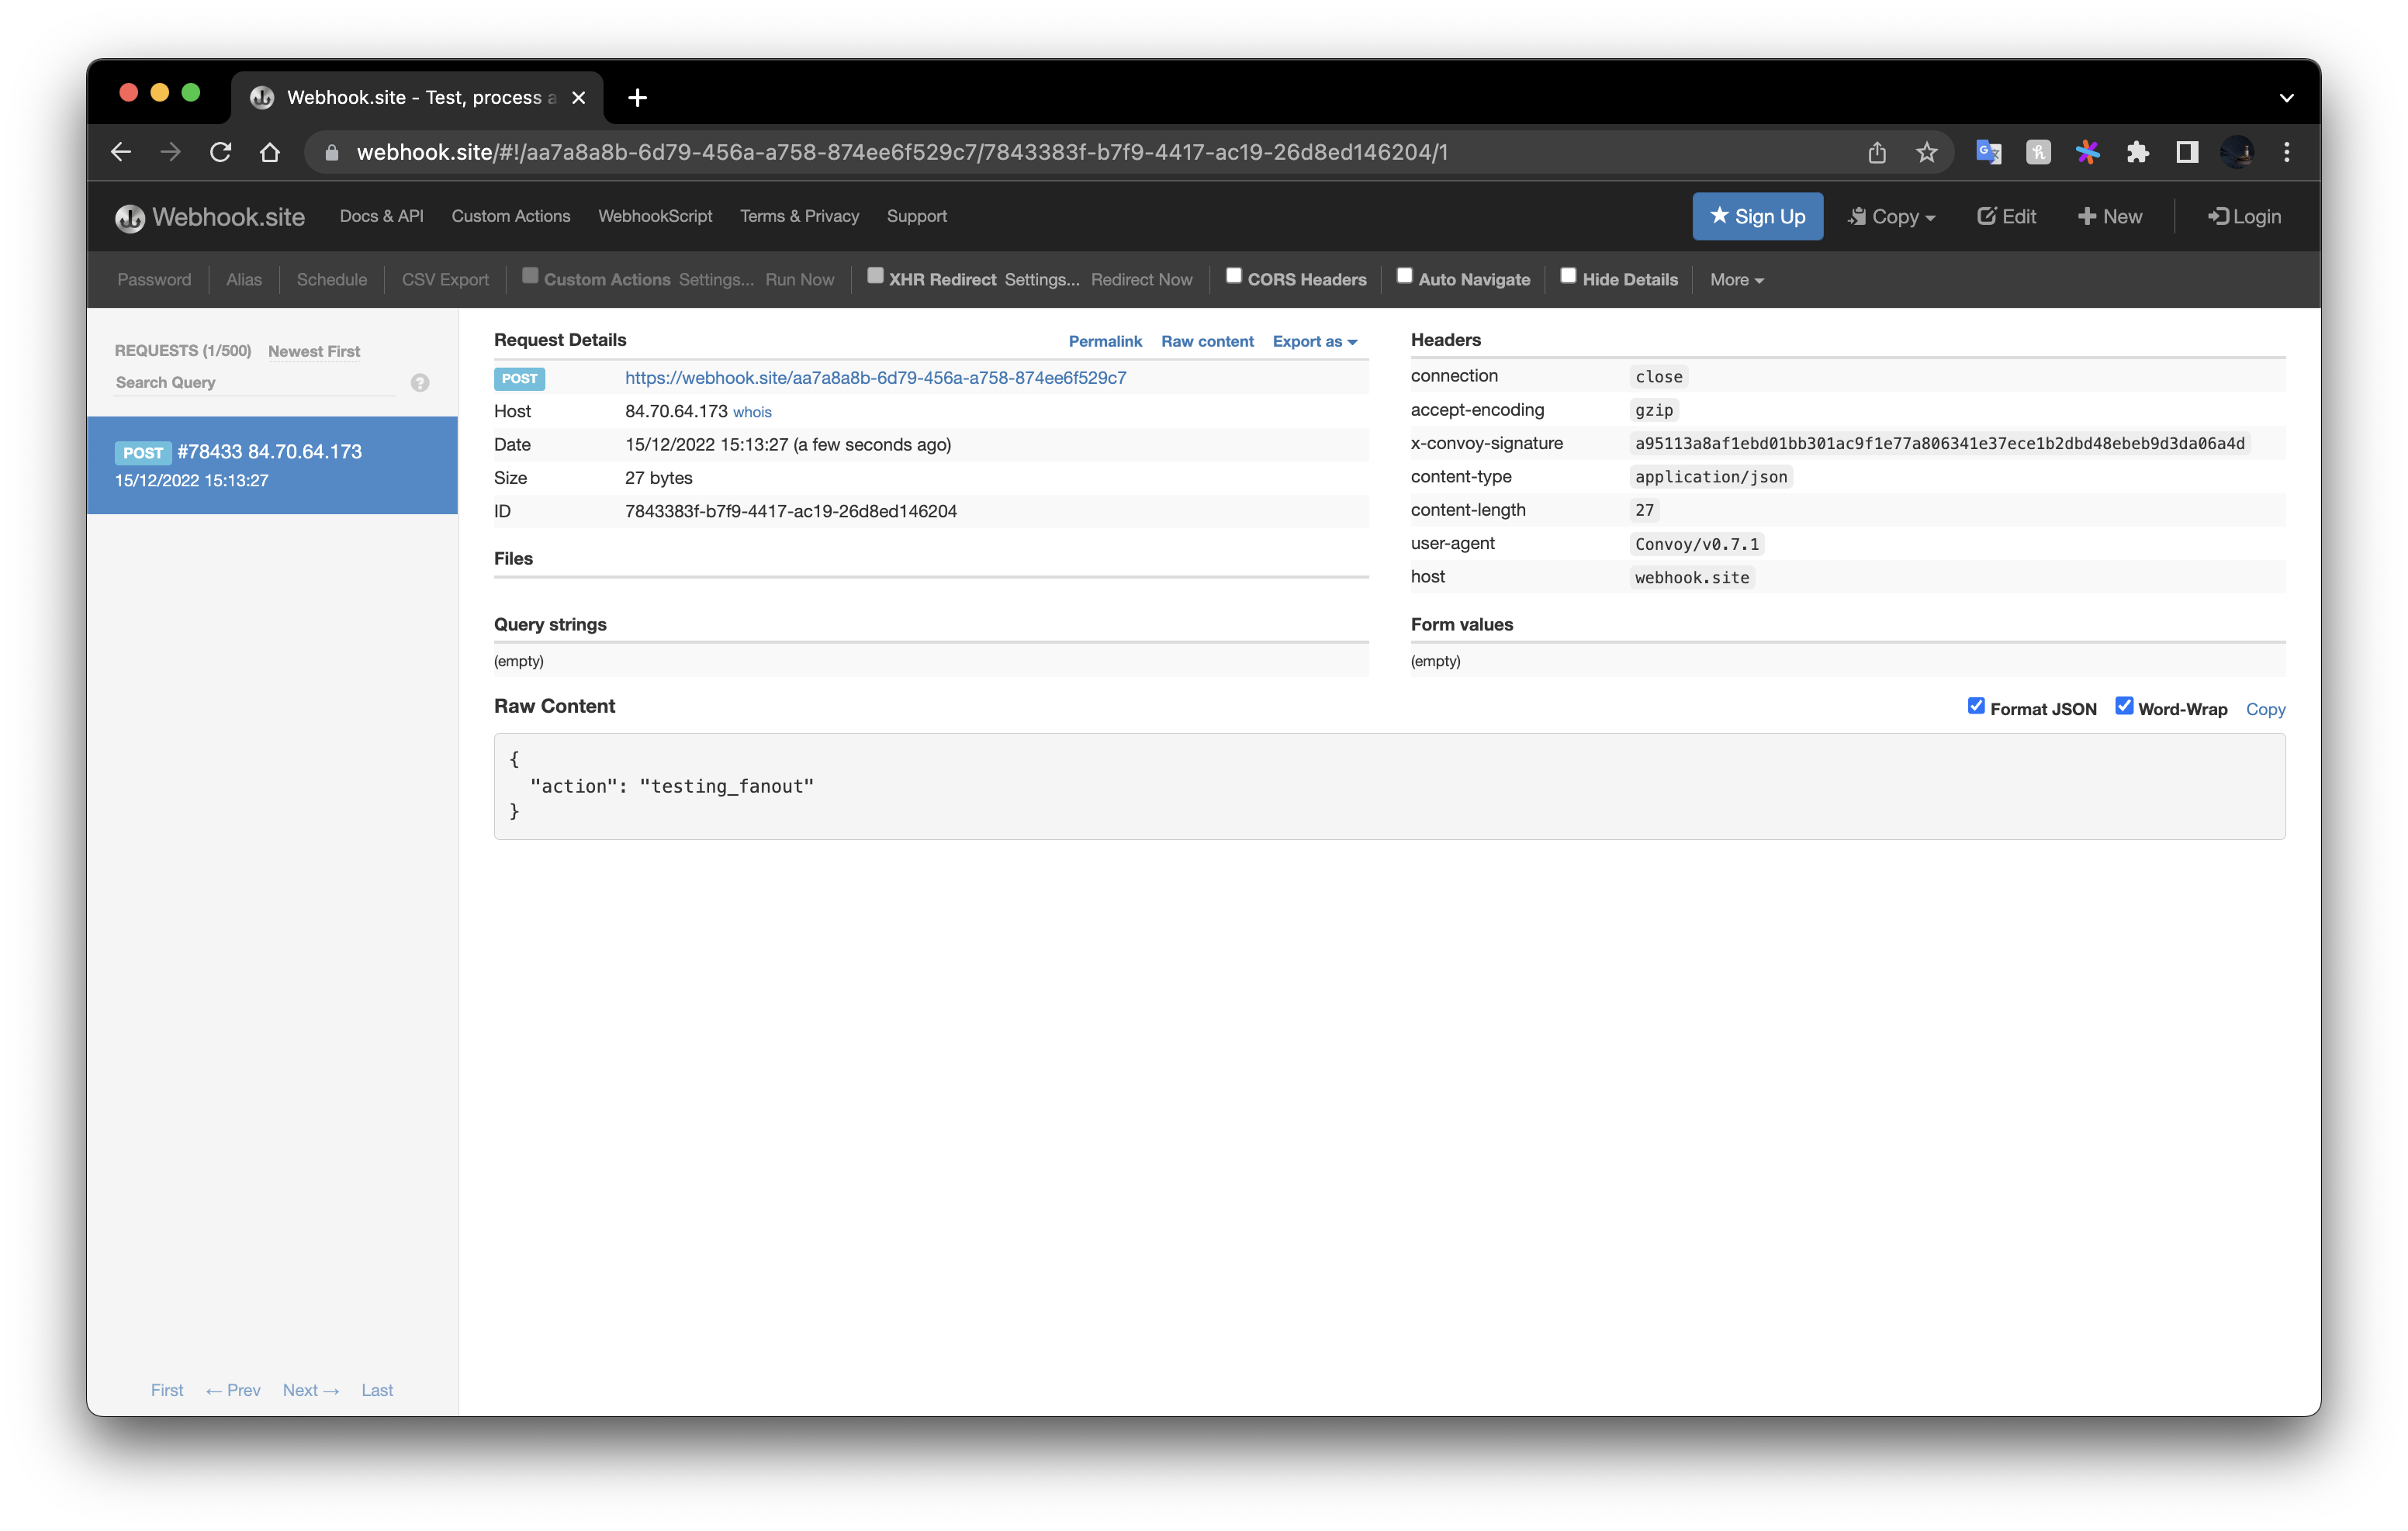
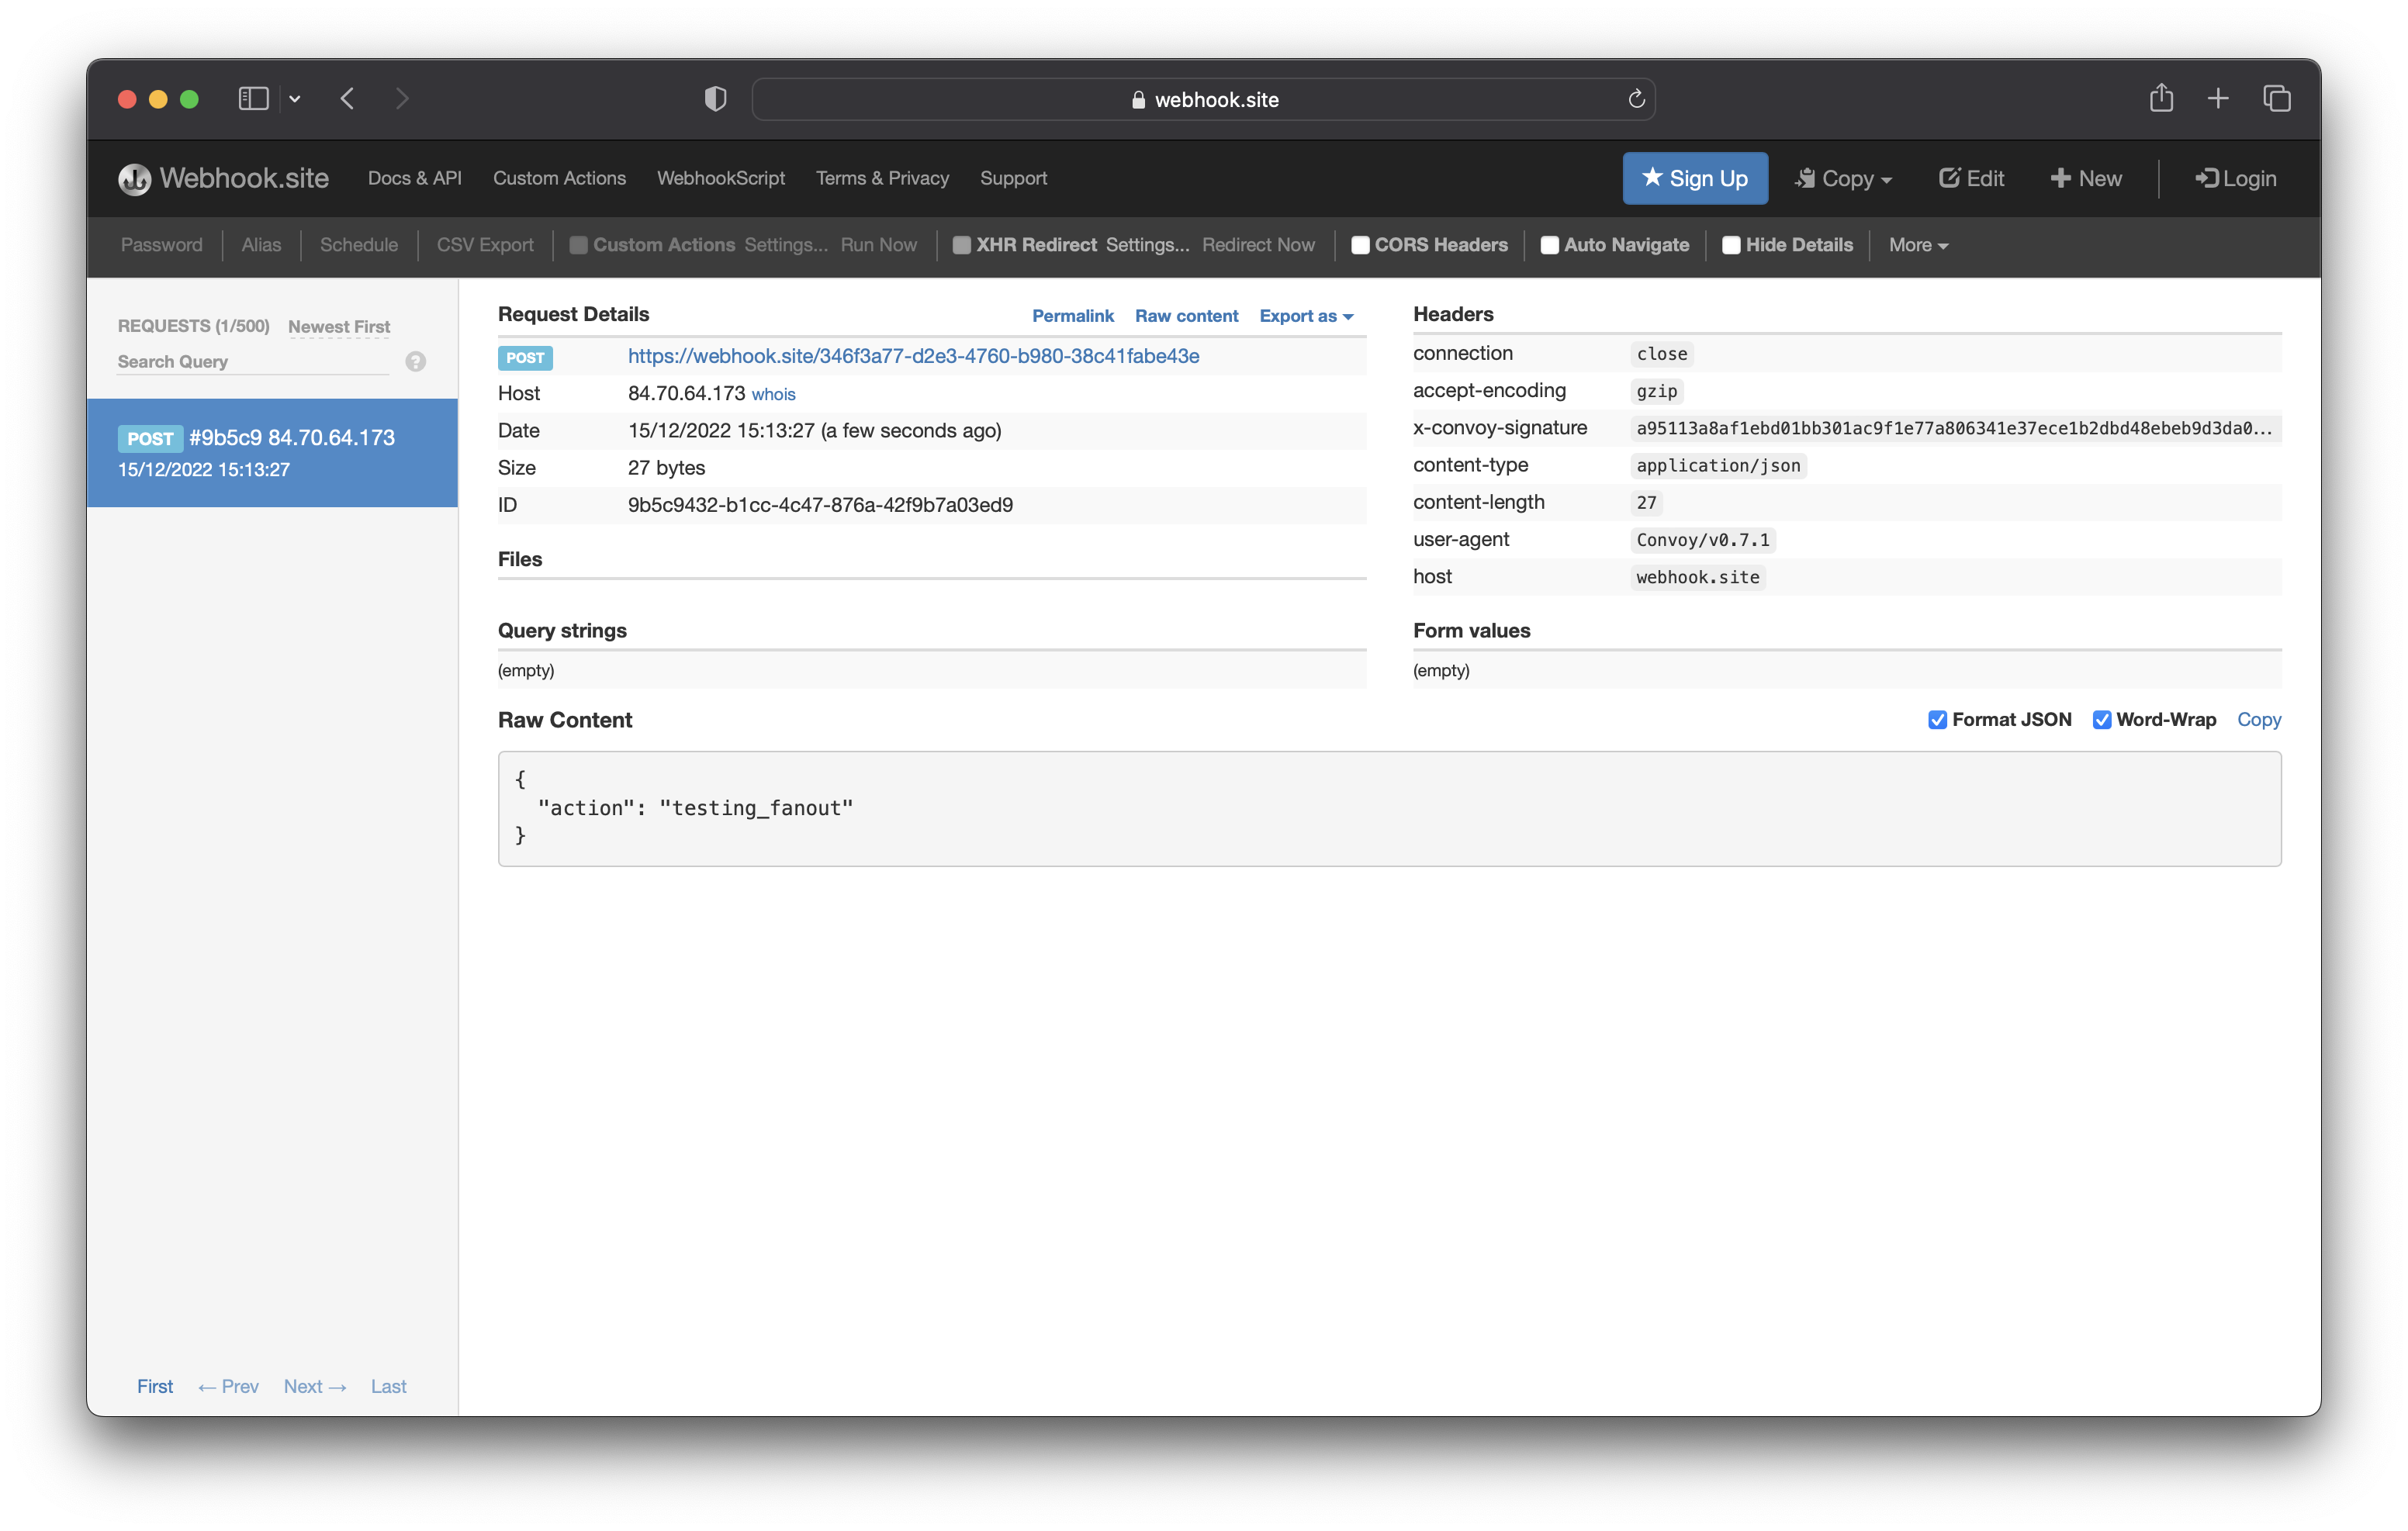
The screenshots below show that the events were routed to the two endpoints.
In this post, we discussed why letting your users provide multiple endpoints is important. We demonstrated this ability in Convoy and how to use it. Sounds good for your platform? Why not try out our free cloud and give us feedback on our slack community!
Till next time ✌🏽