In this code pattern, learn how to authenticate users on your chatbot with an SMS one-time passcode (OTP).
Chatbots are prevalent everywhere. And, some conversations are confidential, so chatbots must verify the authenticity of its users. One example of this is a customer who holds an insurance policy who uses a chatbot to get more information about that insurance policy. Sending a one-time passcode through SMS is a popular way to identify a user.
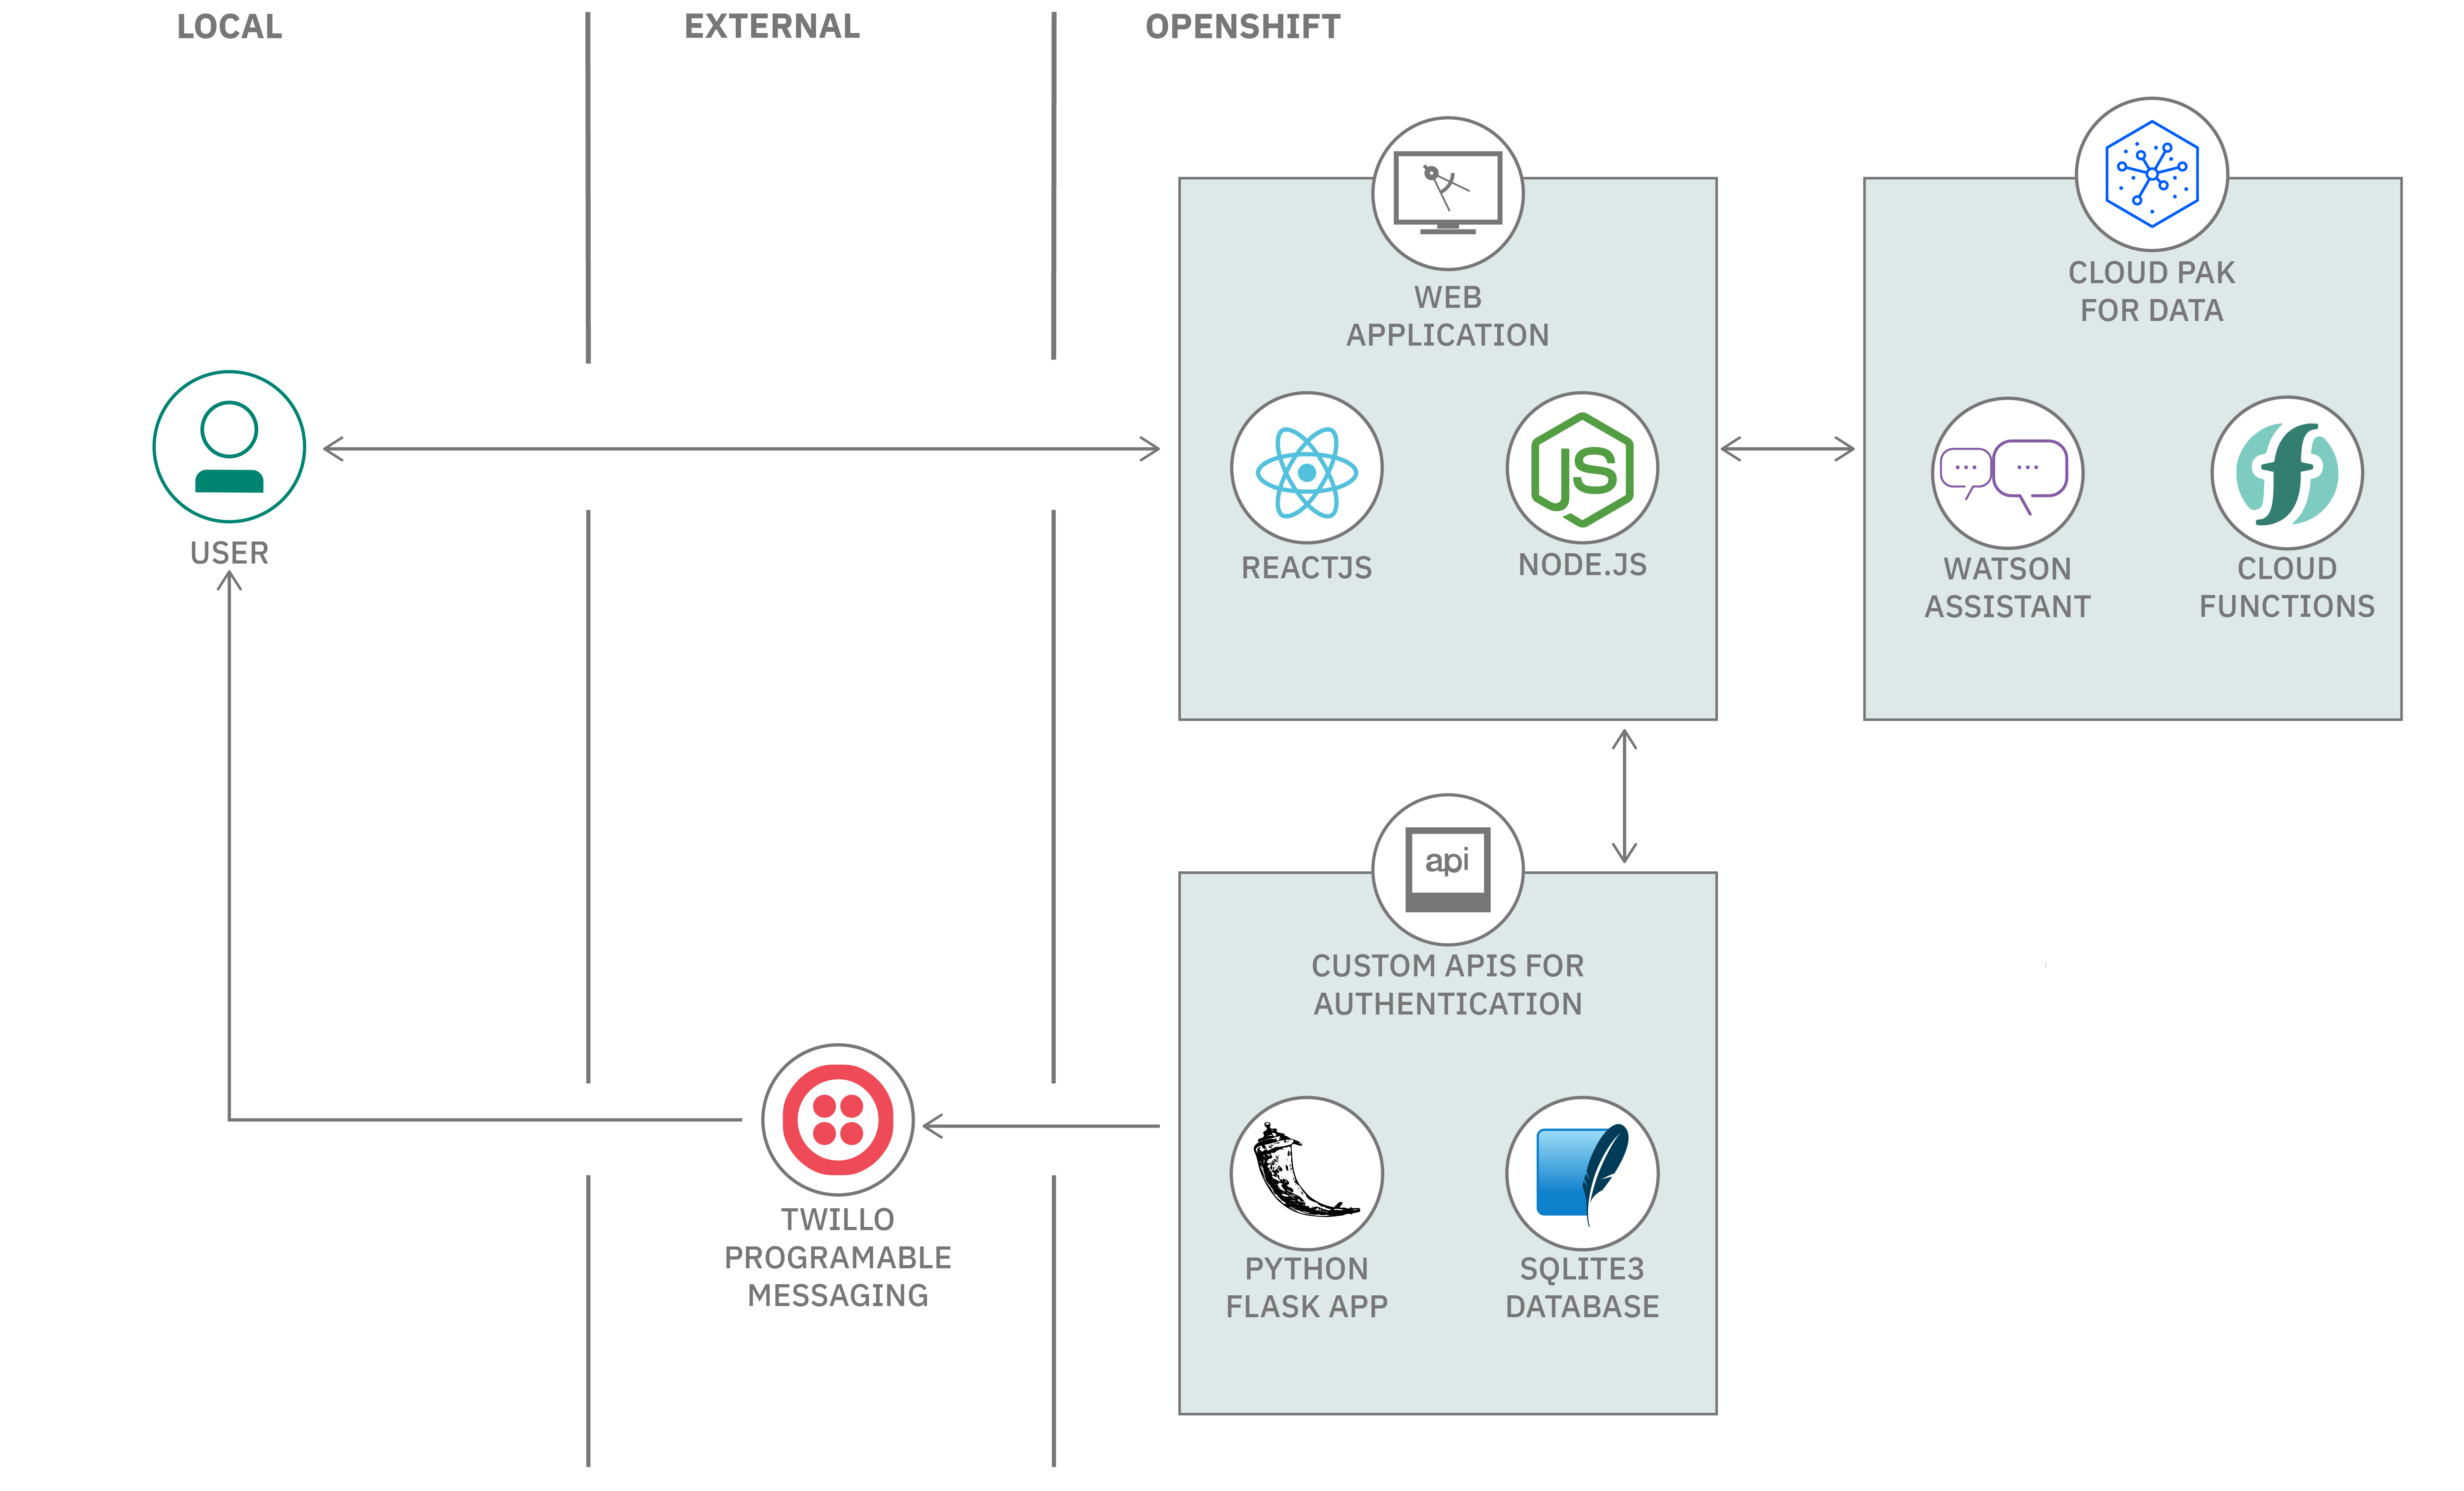
This code pattern shows how to build a chatbot that authenticates users through an SMS one-time passcode. You also learn to use IBM Watson Assistant, IBM Cloud Functions, and custom APIs to build this application.
After you have completed this code pattern, you understand how to:
- Build conversational interfaces into any application, device, or channel
- Run your application code without servers
- Build APIs to authenticate users on your chatbot
- Make external API calls through Watson Assistant
-
The user registers for a policy on the portal.
-
User data is stored in the database, and policy details are sent to the user’s phone number in an SMS through the Twilio Messaging API.
-
The user interacts with the chatbot and asks for confidential information that is related to the policy. Watson Assistant prompts the user to enter the OTP.
-
The query is sent to Watson Assistant, which in turn invokes IBM Cloud Functions to make an API call to the user-defined, back-end API for retrieving information.
-
The database is searched for the user’s phone number, and the OTP generated by the back-end API is sent to the user through Twilio.
-
The user enters the OTP in the chat application to authenticate themselves.
-
Watson Assistant validates the OTP by interacting with the back-end API.
-
The user-requested confidential information is fetched from the database if the OTP is valid.
-
IBM Cloud Functions returns the confidential information to Watson Assistant.
-
Watson Assistant displays the user-requested confidential information.
-
The user can see the confidential information in the chatbot.
This is an Interactive instructions, follow the steps to setup a working instance of the code pattern in the Developer Playground.
Open Terminal
Get the Code Pattern on Playground
- Create a Twilio service account.
- Verify caller IDs.
- Create the Twilio Trial Number.
- Copy Account SID, Auth Token and Phone Number.
For detailed steps click here.
You can build and run the APIs within the Developer Playground, click on Build and Run to start the application.
Build and Run
Configure the APIs by entering the credentials copied in the previous steps and take a note of the APIs URL.
- Create a Cloud Function Action here.
- Copy the code from here and paste as in the canvas for cloud function action.
You need to be logged in to your IBM Cloud account in the Developer Playground to create and configure services.
Open new terminal
Login to IBM Cloud
- Navigate to Watson Assistant Instance from here.
- Follow the steps here to import a Watson Assistant Skill and configure with Cloud Function URL.
You can build and run the APIs within the Developer Playground, click on Build and Run to start the application. You can also manage the created services in IBM Cloud Dashboard.
Build and Run
You can stop the Apps by clicking on the below buttons.
Stop Running APIs Stop Running Web App
Completed the code pattern? Click on Clean up to delete the IBM Cloud services that were created.
Clean up
Find the detailed steps here.
You can find the detailed steps in the README file.